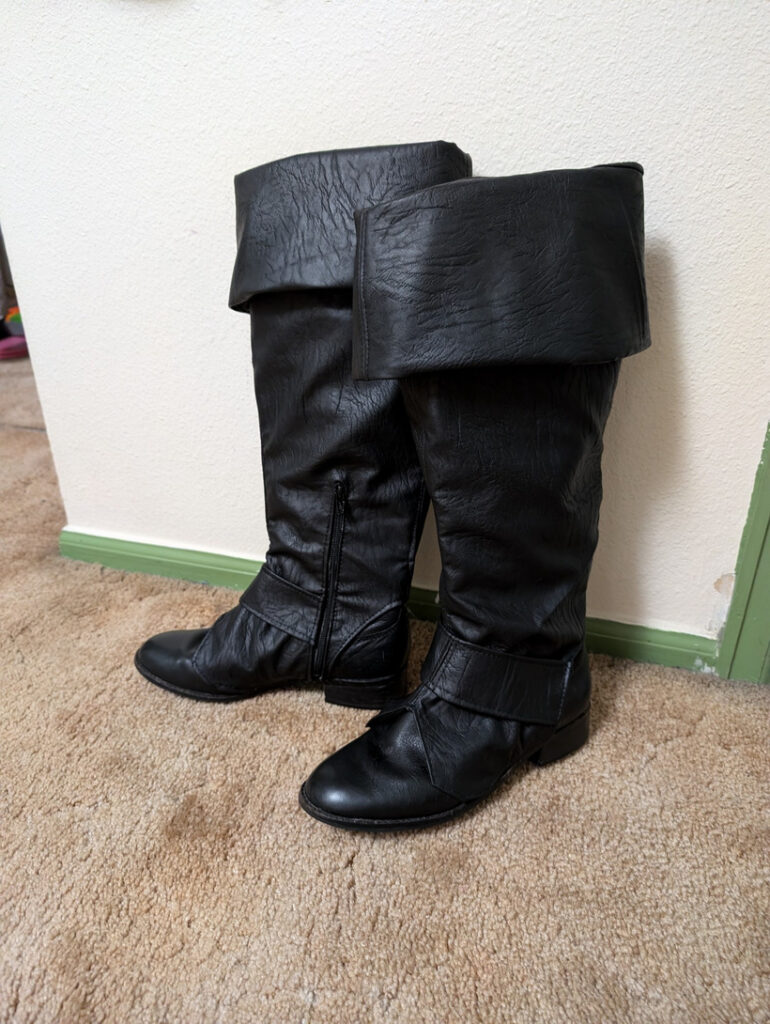
 I was very happy with how fast and easy these boot covers were to make. They ended up being part of my cursed suit Stede cosplay, and I couldn’t be happier.
This is a pretty easy project. I’d give it an intermediate level. It requires just a bit of basic sewing and some understanding of form, but since you build it right off your own calf it’s fairly simple in the long run. We’re gonna use the plastic wrap and tape method to get these together!
What you’re going to need:
-Some cheap a$$ boots you don’t mind destroying*
-Plastic wrap or plastic bags that can fit over the boot
-Tape, this can be duct tape, packing tape, masking tape or pretty much any other type of tape. I just recommend something around 2″ wide as it will speed up the process
-The boot cover fabric (I used around 1.5 yards of black pleather)
-Lining fabric (I recommend just using leftover non-stretch fabric from your stash, and depending on the boot you choose you may be able to skip this entirely)
-Thread matching the boot fabric
-Glue (I recommend E6000, if you decide to make a temporary boot cover you can skip this and use elastic instead)
*You can use boots that you like, but gluing and sewing the bootcover to the shoe is my recommended way of adding them to the final boot, so I recommend cheap boots from the thrift store that fit reasonably well but that you don’t mind destroying. You CAN even use ankle boots to make these, as long as you’re good with creating the form of the boot with some paper or foam(under the plastic wrap). You DO however want boots that have a zipper closure unless you’re more experienced with sewing and are comfortable adding in a zipper yourself
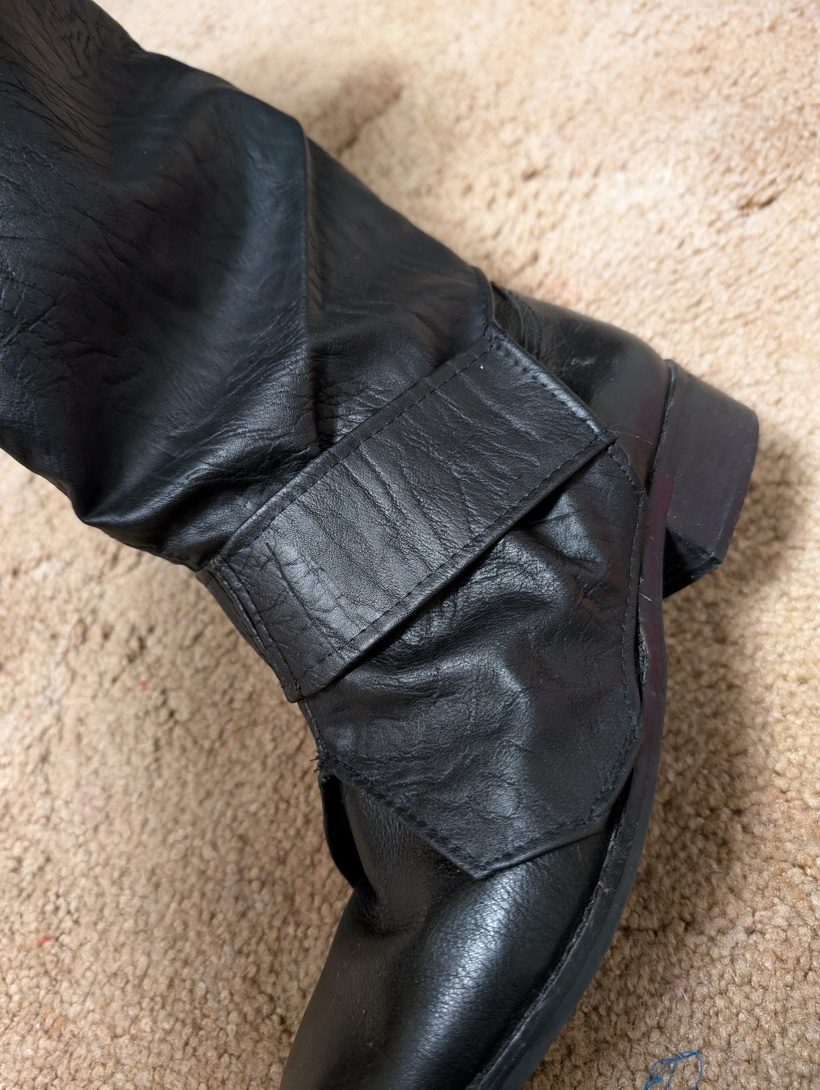
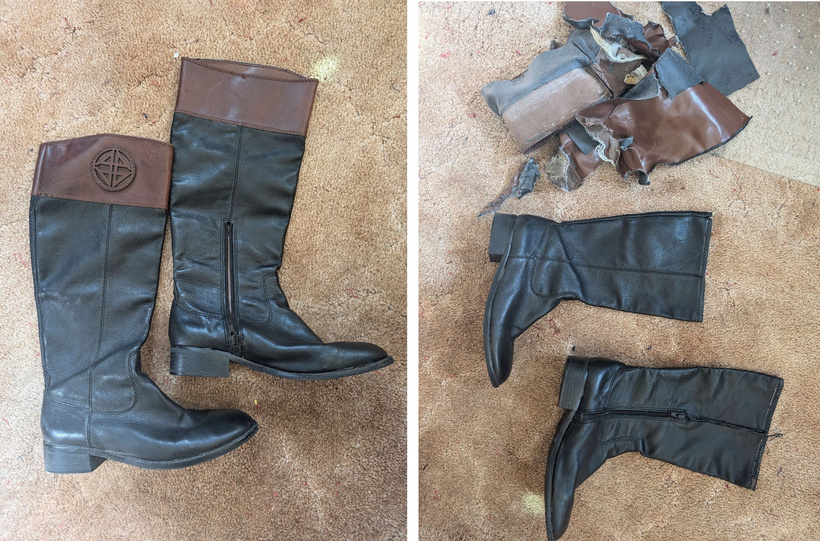
1. First things first get your boots and tailor them as needed. In this case I removed the tops and most of the insides since the insides were falling apart on these. You do whatever you need done to get the basic shape you want.
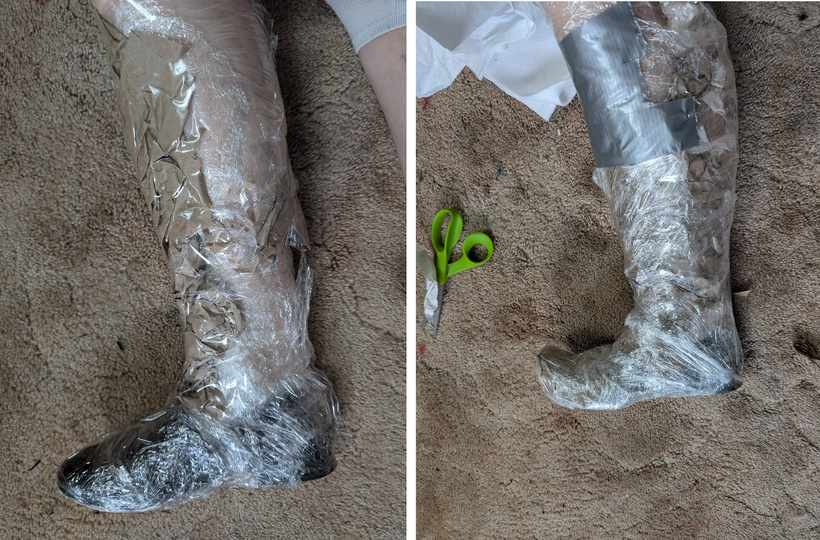
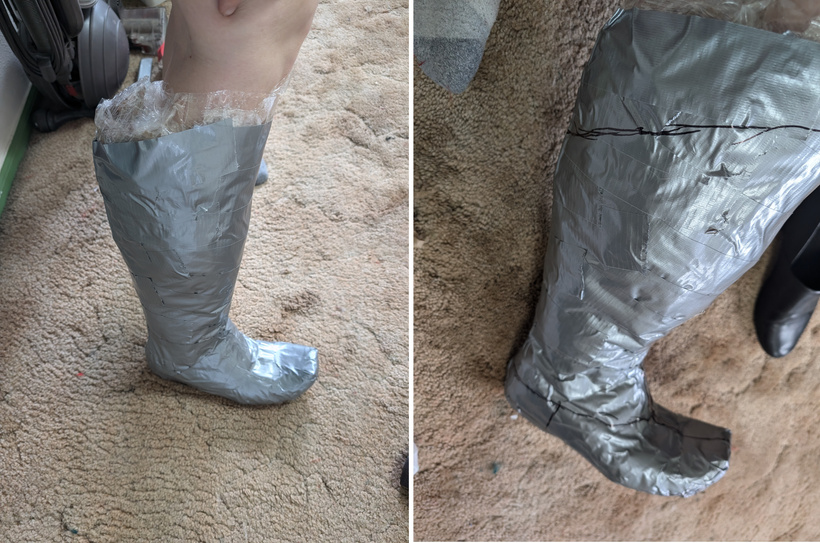
2. Put your boot on. If the boot isn’t the right shape you’re going to pad the boot and your calf until it is. You can use foam, paper, plastic bags and tape to create the right shape. Then you’re going to cover the whole thing in plastic wrap or your plastic bags. You’re going to carefully (without messing up the shape of the boot, tape around the plastic bags until the plastic and tape is form fitting to the boot. (Did I forget to take pictures of this step, yes, but here’s a photo of me doing the process with a different shoe:
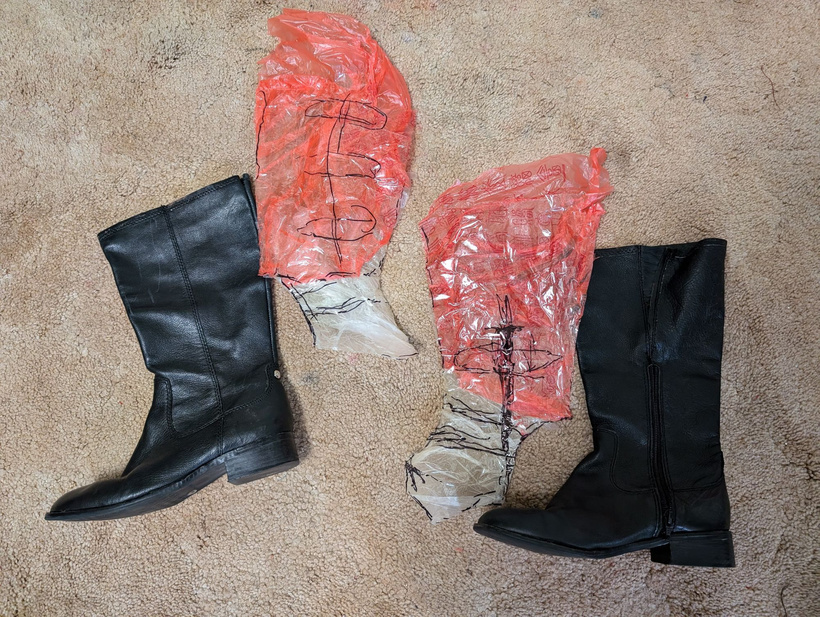
3. Draw on the completed tape sculpture some lines for where you want the seams to go. Make sure to mark the top of the boot, as well as where you want it to glue into the shoe. In the case of my pirate boots I wanted the toe and heel of the actual boot to be visible and instead only glued along the bottom sides of the boot covers. I also recommend adding in some marks to help with attaching pieces together after the fact.
It’s also OKAY if you’re not exactly sure where you want all the seams to go just yet. Mark the ones you do know, the top and bottom of the boot, the zipper, and at least one vertical seam that goes from the top to the bottom (you’re going to cut along this line to get yourself out).
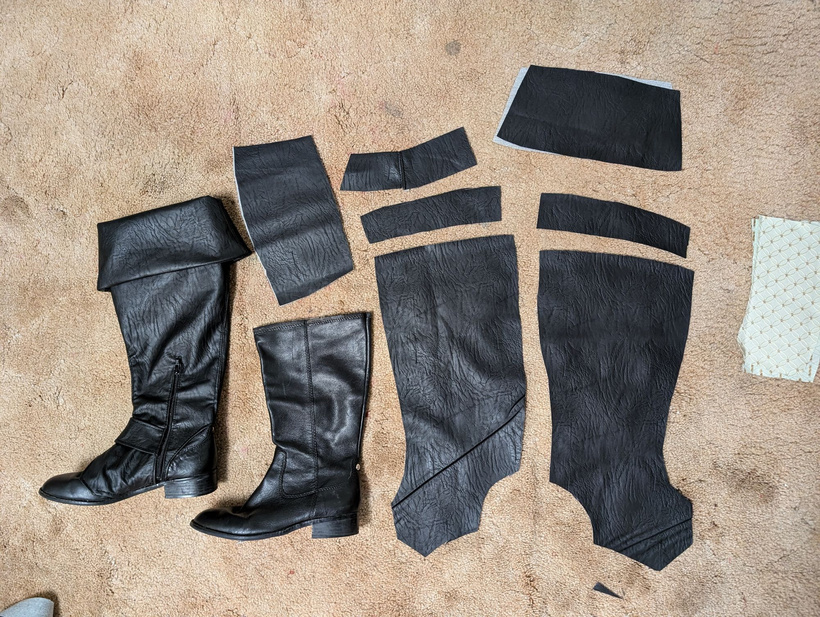
4. Cut yourself out of the boot along the vertical line and cut out your pieces where you want the seams to go. If you didn’t mark these before, you’re going to need to mark these now.
 In my case I forgot to mark the top of the boots…don’t be like me.
5. Now you’re going to adjust the pattern as needed. In this case I wanted the boot covers to be taller and fold over so I just adjusted them in the flat pattern. To create a flat pattern stick your plastic pattern onto a piece of paper and trace around it. Don’t forget to add seam allowance! (I recommend 5/8 of an inch)
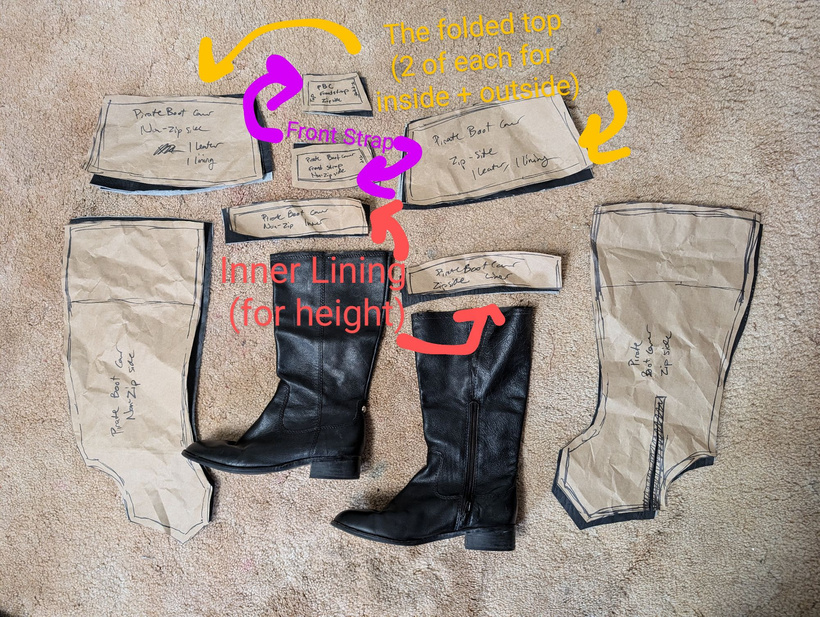
For a little bit more of an explanation for how to make the pattern, or how these pieces go together here are a couple diagrams for you to look at:
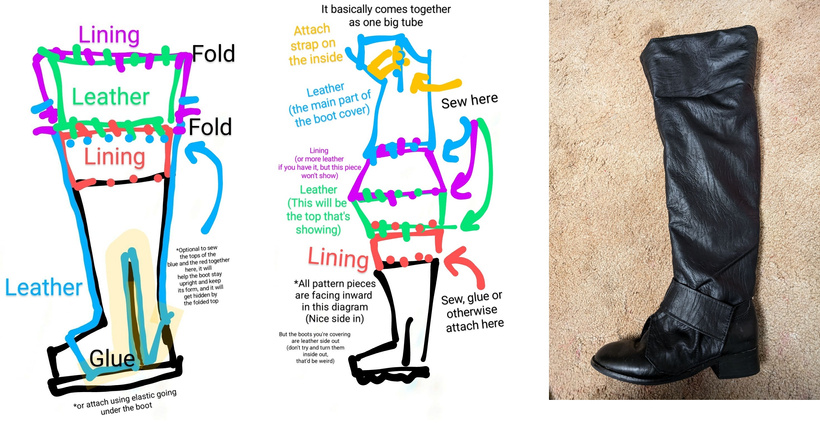
6. Sew the pieces together. You’re basically going to sew them into one big tube and then attach them to the boot. You want all pieces facing each other. When you attach these to the boot the face of the pieces should be in the inside (the part that you want showing). You’ll then fold the top part of the tube over the boot. Then glue down the ends and you’re done!
I should have taken more photos but here’s a couple helpful tips instead:
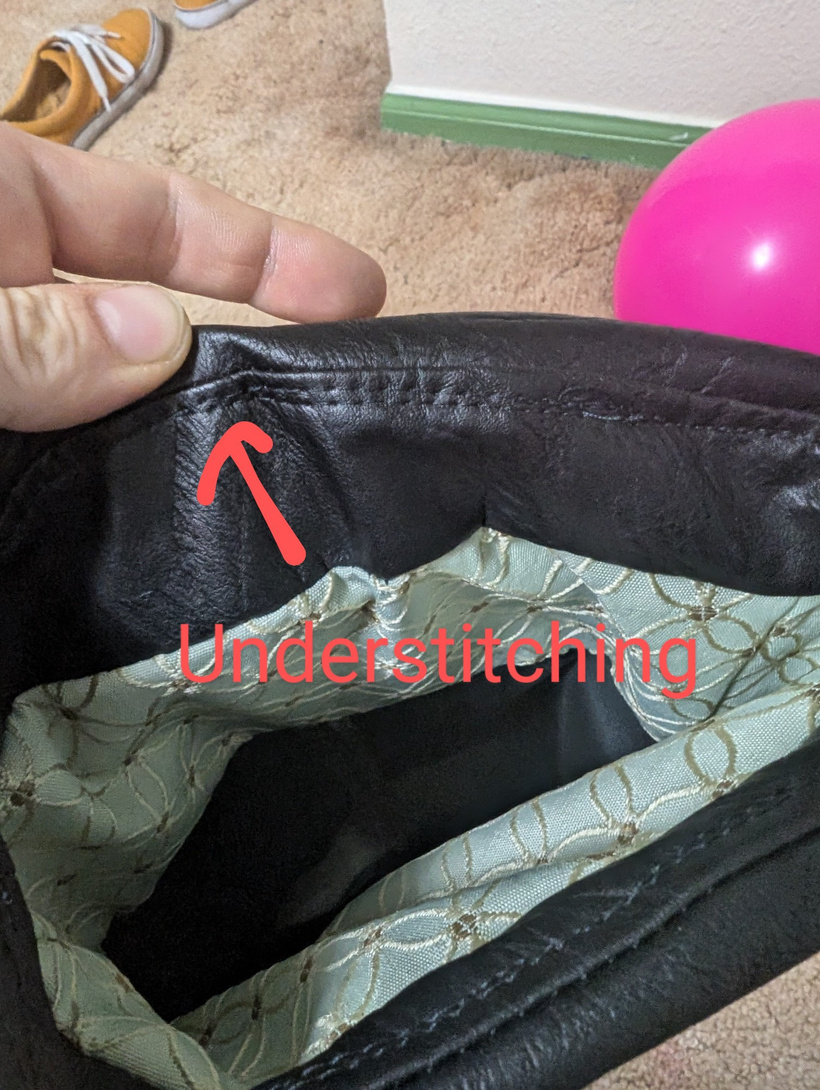
-Understitch your seams to the lining when working with a thick material, it will help the seams fold better.
-to use less leather you can cut the inner Lining in two and use a sturdy fabric at the 1.5 inch mark from the top
-Don’t forget to hem the bottoms and along the zipper
-If you don’t want to glue and sew the boot covers directly to the boots you can use a mix of snaps and elastic to attach them instead
-No need to fully finish seams, but I do recommend double top stitching where you want flat seams
And voila! Pirate boots!